25+ Best Kodi IPTV Addons (2024)
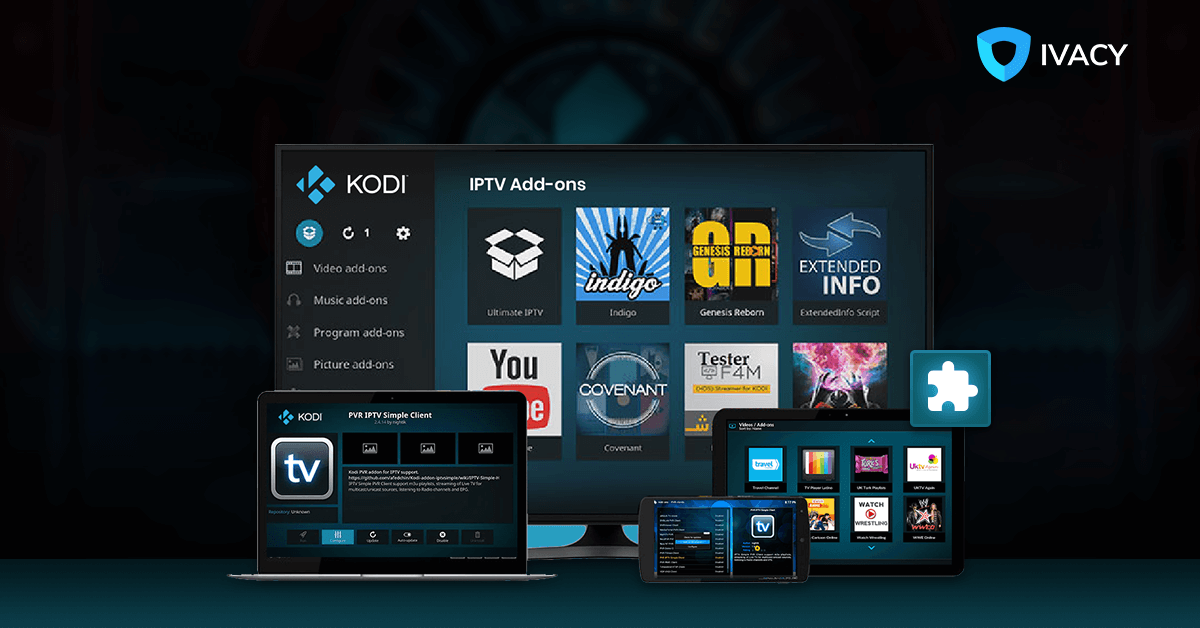
Kodi is renowned for its on-demand movies and TV shows but the ability to stream live TV is another great reason why you should install the box. Speaking of streaming live TV, IPTV on Kodi is a far more convenient option than any other alternative available in the market. So what are the best Kodi IPTV addons? We have created a list of the best Kodi IPTV add-ons that you’re going to love!
Updated 1 Jan 2024: This blog is updated with the latest information. It now informs readers whether or not free VPNs are safe, and it explains the legality of VPNs in different regions.
Why use a VPN?
Before you learn about the best Kodi IPTV addons, it is important for you to understand the importance of using a VPN. Be it for IPTV Kodi addons or any other purpose online, you will need a VPN to not only unblock access, but also to protect yourself from hackers, cyber-criminals, third parties, and so on. A VPN will be a barrier between you and the issues plaguing the internet. Remember though, this only works if you use a reliable Kodi VPN, like Ivacy VPN.
To set up Ivacy VPN, here is what you need to do:
- Get an Ivacy VPN subscription.
- Download and install the Ivacy VPN app on your device.
- Connect to the VPN server of your choice, or according to your needs and requirements.
- Browse and stream effortlessly and without any restrictions henceforth.

Best Free IPTV Kodi Addon In 2024
Here is a list of the best Kodi IPTV Addons that are going to double your fun when watching IPTV on Kodi.
1. cCloud TV

We rank cCloud TV as one of the best Kodi IPTV add-ons. cCloud has a massive library that is second to none. You can literally stream thousands of channels from across the world including the most popular ones like HBO, CBS, AMC, and ESPN. A huge number of local US network channels and networks from the UK, Japan, Korea, Germany, and more are also available for streaming.
cCloud TV installation:
- Open Kodi
- Select SYSTEM > File Manager
- Select Add Source
- Select None
- Type the following EXACTLY http://lazykodi.com and select Done
- Highlight the box underneath Enter a name for this media Source & type slam
- Select OK
- Go back to your Home Screen
- Select SYSTEM
- Select Add-Ons
- Select Install from the zip file
- Select Lazy > ZIPS > kodibae.zip
- Wait for Add-on enabled notification
- Select Install from the repository
- Select Kodi Bae Repository
- Select Video Add-Ons
- Select cCloud TV
- Select Install
- Wait for Add-on enabled notification
2. BBC iPlayer (iPlayer WWW)

BBC iPlayer is one of those Kodi IPTV add-ons if you are solely interested in watching content that is exclusive to BBC Network. It will prove to be the best Kodi IPTV addon for a wide range of UK channels. However, in order to access the BBC iPlayer addon’s geo-restricted content, you’ll need to unblock it with a VPN.
3. Pluto.TV

The Kodi IPTV addon directly connects with Pluto.TV streaming service and website. It makes all the content available on your Kodi device.
Pluto.TV installation guide:
- Open Kodi > Addons > Unbox icon
- Select Install from repository
- Select Kodi Addon Repository
- Select Video add-ons
- Select Pluto.TV
- Wait for Add-on enabled notification
4. USTVNOW

This Kodi IPTV addon is best suited for American ex-pats living outside the US of A. With this addon, you can watch your favorite US TV channels, that too without any stability issues. USTVNOW is easy-to-use, which is why it has made its way onto this list.
USTVNOW Installation Guide:
- Open Kodi > Addons > Unbox icon
- Select Install from the repository
- Select Kodi Addon Repository
- Select Video add-ons
- Select USTVNOW
- Wait for Add-on enabled notification
5. SGTV Live TV
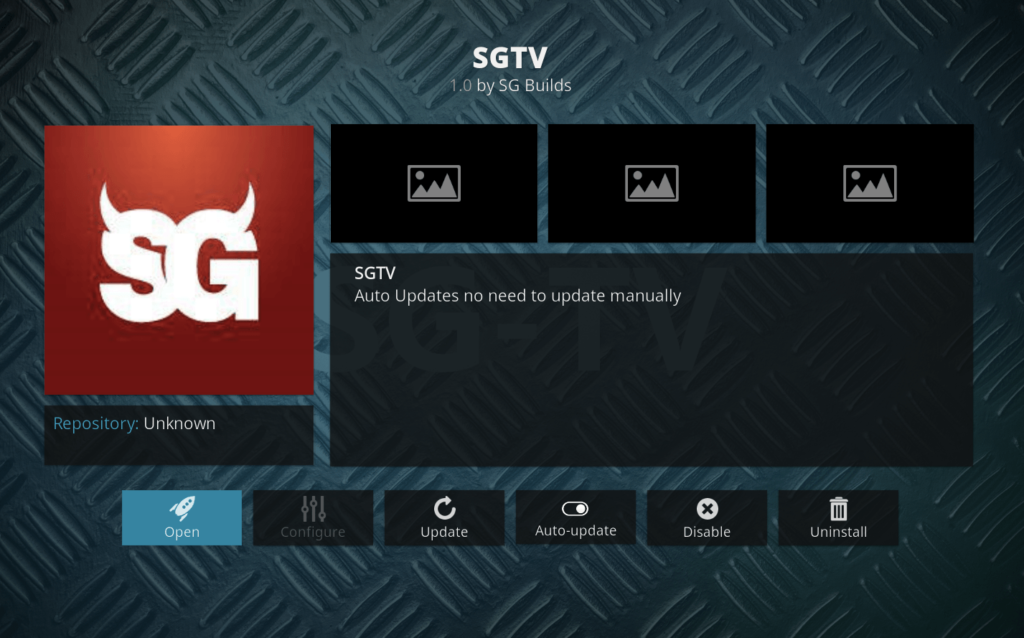
This is not an old addon, but it is an extraordinary Kodi IPTV addon that will keep you coming back for more. With SGTV Live TV you can enjoy everything there is to live TV content in a click or two. The addon is specifically catered to people that want live news, and they have categories like Okto, Channel News Asia, LIVE, and so on to choose from. The content is limited, but the links there work like a charm.
SGTV Live TV installation guide:
- Access Kodi > Settings > File Manager > Add Source.
- Select None, and enter the following URL: http://sgwizard.96.lt/.
- Select OK.
- Rename the Source as SGTV.
- Select OK.
- Return to the home page > Addons > Package Installer Icon > Install from Zip File
- Locate SGTV > plugin.video.sgtv.zip
- Await addon installation completion.
6. Live 24/7
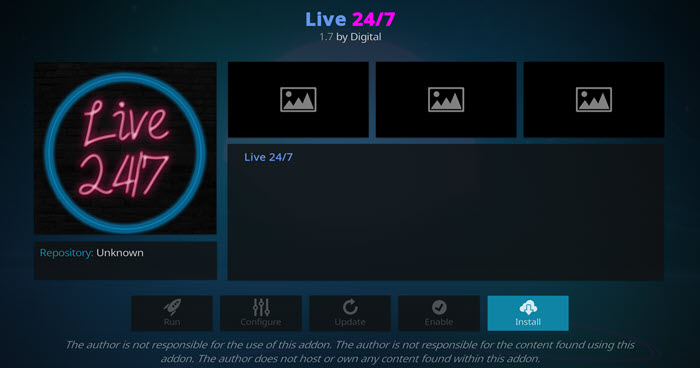
What is really interesting about Live 24/7 is that it offers live TV content from other Kodi IPTV addons. It is an integrated Kodi IPTV addon that allows viewers to stream content from multiple addons. The content available here is categorized as 24/7 Networks, 24/7 Shows, 24/7 Movies, etc.
Live 24/7 Installation Guide:
- Access Kodi > Settings > File Manager > Add Source.
- Select None, and enter the following URL: http://xdigital.xyz/repo/.
- Select OK.
- Rename the Source as Live 24/7.
- Select OK.
- Return to the home page > Addons > Package Installer Icon > Install from Zip File
- Locate Live 24/7 > repository.digital.0.0.9.zip.
- Return to the previous screen > Install from Repository > Digital Repo > Video Addons > Live 24/7.
- Await addon installation completion.
7. Falcon Ultra IPTV
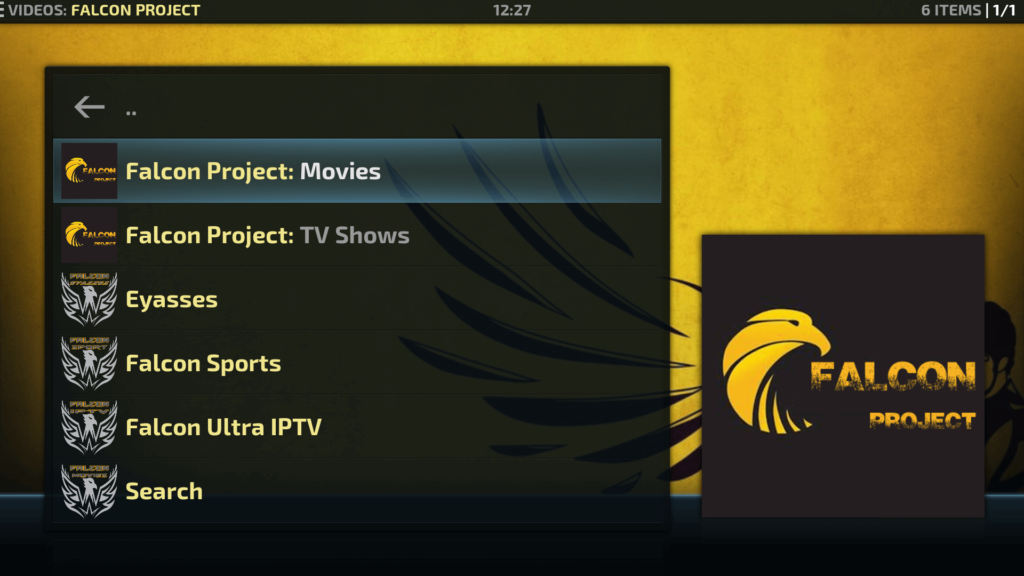
Falcon Ultra IPTV Installation Guide:
- Access Kodi > Settings > File Manager > Add Source.
- Select None, and enter the following URL: http://ajbullds.uk/repo.
- Select OK.
- Rename the Source as Falcon.
- Select OK.
- Return to the home page > Addons > Package Installer Icon > Install from Zip File
- Locate Falcon > repository.aj.zip.
- Return to the previous screen > Install from Repository > Ajs Repository > Video Addons > Falcon Ultra TV.
- Await addon installation completion.
8. Skynet
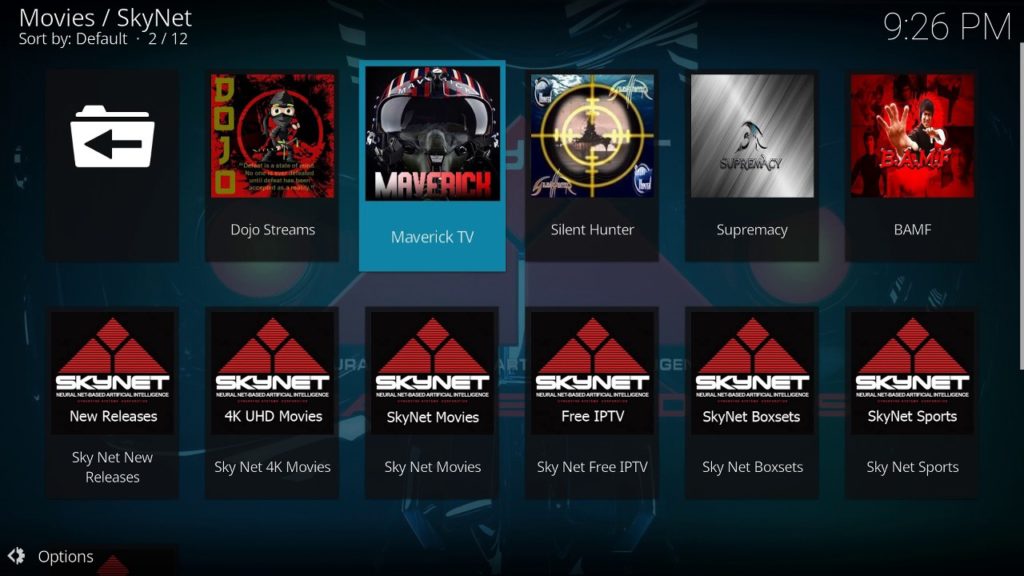
Skynet Installation Guide:
- Access Kodi > Settings > File Manager > Add Source.
- Select None, and enter the following URL: http:///maverisktv.net/mavrepo/.
- Select OK.
- Rename the Source as Skynet.
- Select OK.
- Return to the home page > Addons > Package Installer Icon > Install from Zip File
- Locate Skynet > repository.maveriskrepo-3.5.zip.
- Return to the previous screen > Install from Repository > Maverick TV Repo > Video Addons > Skynet.
- Await addon installation completion.
9. Cerebro IPTV
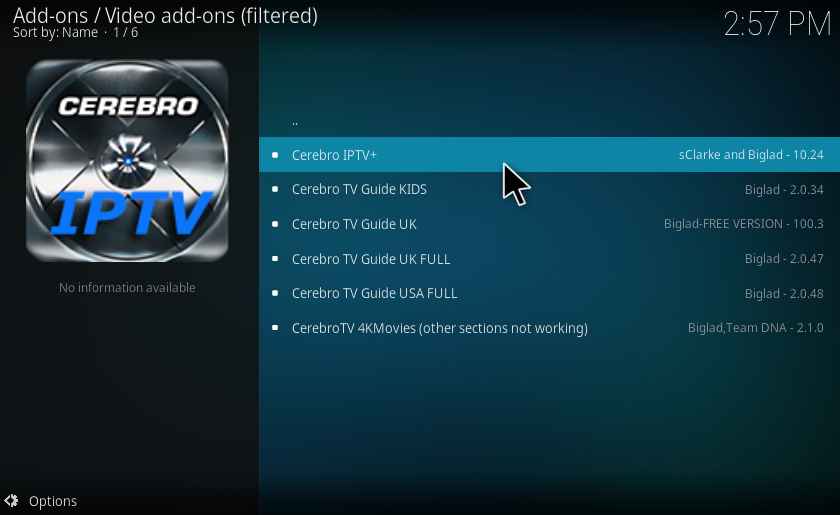
Cerebro IPTV Installation Guide:
- Access Kodi > Settings > File Manager > Add Source.
- Select None, and enter the following URL: http://srp.nu/.
- Select OK.
- Rename the Source as Cerebro.
- Select OK.
- Return to the home page > Addons > Package Installer Icon > Install from Zip File
- Locate Cerebro > Krypton > all > superrepo.kodi.kryptn.all-0.7.04.zip.
- Return to the previous screen > Install from Repository > SuperRepo All Krypton V7 > Video Addons > Cerebro IPTV+.
- Await addon installation completion.
10. Ultra IPTV
Out of all the Kodi IPTV addons out there, Ultra IPTV is one of the very few that has been developed to surf live feeds from all over the internet. It has content from the US, UK, Canada, and even India. But the Kodi IPTV addon lacks in terms of usability, as it is a bit more complicated than other addons on this list.
Ultra IPTV Installation Guide:
- Access Kodi > Settings > File Manager > Add Source
- Select None, and enter the following URL: http://cazlo.com/repo/
- Select OK.
- Rename the Source as Ultra
- Select OK
- Return to the home page > Addons > Package Installer Icon > Install from Zip File
- Locate Ultra > repository.cazlo-2.0.zip
- Return to the previous screen > Install from Repository > Cazlo Repository > Video Addons > Ultra IPTV
- Await addon installation completion.
11. Goodfellas
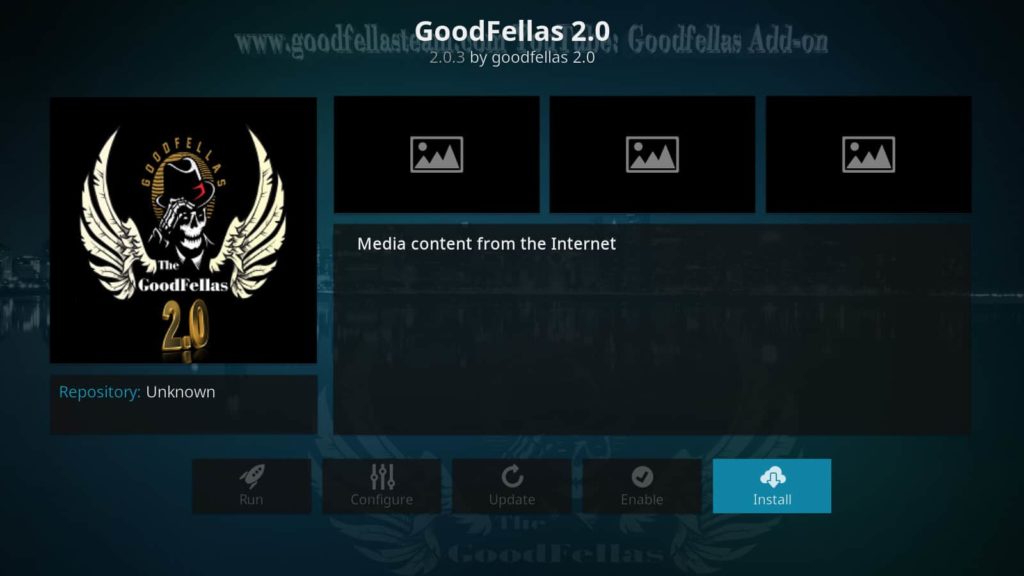
Goodfellas Installation Guide:
- Access Kodi > Settings > File Manager > Add Source
- Select None, and enter the following URL: http://www.goodfellasteam.com/Repository/
- Select OK.
- Rename the Source as Goodfellas.
- Select OK.
- Return to the home page > Addons > Package Installer Icon > Install from Zip File
- Locate Goodfellas > repository.goodfellas.zip.
- Return to the previous screen > Install from Repository > Goodfellas Repo > Video Addons > Goodfellas.
- Await addon installation completion.
12. Chronos
Chronos Installation Guide:
- Access Kodi > Settings > File Manager > Add Source.
- Select None, and enter the following URL: http://skydarks.com/skydarks/.
- Select OK.
- Rename the Source as Chronos.
- Select OK.
- Return to the home page > Addons > Package Installer Icon > Install from Zip File
- Locate Chronos > repository.skydarks-7.0.0.zip.
- Return to the previous screen > Install from Repository > Skydark’s Repository > Video Addons > Chronos.
- Await addon installation completion.
13. Milhano IPTV

What makes this Kodi IPTV addon unique is that it is able to offer streams from almost any location you can think of. It has a ton of content, and you will never be bored ever again.
- Access Kodi > Settings > File Manager > Add Source.
- Select None, and enter the following URL: http://j2mf4.com/download/.
- Select OK.
- Rename the Source as Milhano.
- Select OK.
- Return to the home page > Addons > Package Installer Icon > Install from Zip File
- Locate Milhano > plugin.ideo.ttuga.milhano-0.1.zip
- Await addon installation completion.
14. The Crew
The Crew is at the top of our list of the greatest Kodi Live TV Addons. This is one of the most popular Kodi add-ons in general nowadays.
This add-on is available in The Crew Repository, where it may be found in categories such as Sports, IPTV, Movies, TV Shows, 1 Clicks, Comedy, Tools, and many more.
- Launch Kodi.
- Click the Settings icon.
- Click System.
- Hover over the Add-ons menu item and turn on Unknown sources if not already on.
- Select Back on the remote to go back to the System page.
- Select File Manager.
- Click on Add source.
- Click on <None>.
- Type the following URL exactly how it is listed here – https://team-crew.github.io and click OK.
- GitHub is the official website that hosts this repository URL.
- Highlight the box under the source that you just typed in and enter a name for this media source, type “crew” or any other name you would like to identify this source as, and click OK.
- Click your back button on the remote or keyboard until you are back on the System screen.
- Choose Add-ons.
- Click Install from zip file.
- Choose “crew” or another name you assigned the media source in the previous step.
- Click the repository URL – repository.thecrew-0.3.1.zip.
- Wait for The Crew Repo Add-on installed message to appear.
- Click Install From Repository.
- Choose The Crew Repo.
- Click Video Add-Ons.
- Choose The Crew.
- Click Install.
- Kodi will then prompt the message below stating “The following additional add-ons will be installed”, Click OK.
- Wait for The Crew Add-on installed message to appear.
- Click the back button until you return to the home screen, then scroll down and click Add-ons.
- Scroll over and select The Crew add-on.
- Installation of The Crew is now complete. Enjoy!
15. 7 of 9

To watch Live TV via 7 of 9, go to the main screen and select the IPTV category. When you do this, you will be invited to install the Beat Quadrant – IPTV addon. You may watch live TV stations after installing this addon.
You may explore the channels by genres such as Movies, TV Shows, and others. This addon’s IPTV section additionally provides a channel selection based on country.
You may also look at categories like Entertainment, Kids, Sport, Documentary, Music, News, Food, and others.
Some of these categories also need the installation of other add-ons, such as TV-TAP and Swift Streamz.
16. Xumo TV

It is a legal, free, and ad-supported program that allows you to watch networks such as NBC News, Fox Sports, and Bloomberg. Registration is not required for Xumo TV. You can begin streaming immediately.
Xumo TV is exclusively available in the United States, but you may view it from anywhere using a VPN by connecting to a US server.
Xumo provides apps for FireStick, Android, iOS, Roku, and more platforms. They also have a free Kodi add-on. This add-on may be downloaded through the official Kodi Add-ons Repository.
To use the live TV Xumo TV addon function, you will be requested to install an extra addon InputStreams Adaptive.
17- NewsOn
If you want to watch local news on local stations in the United States, NewsOn is perhaps the greatest live TV addon for Kodi.
Aside from the live feed, NewsOn allows you to catch up on the news broadcast for up to 48 hours.
NewsOn is an official service that can be downloaded via the Kodi Add-ons Repository. The business also provides a free FireStick app.
18. Exodus Redux

Exodus Redux is a popular addon known for its extensive library of movies and TV shows. It offers users a wide range of content options for streaming. With its user-friendly interface, users can easily navigate through the addon and find their favorite movies and TV series. Additionally, Exodus Redux supports IPTV streaming, providing access to various live TV channels from around the world. This addon is highly regarded for its reliable streaming capabilities and the vast selection of on-demand content it offers.
19. Tempest

Tempest is an addon that focuses on providing high-quality streaming links for movies, TV shows, and live TV channels. It offers a wide range of content, allowing users to access their favorite movies and TV series easily. With Tempest, users can enjoy high-definition streaming and reliable sources for their entertainment needs. The addon is known for its constantly updated links and the ability to deliver a seamless streaming experience.
20. Seren

Seren is a premium addon that offers a premium streaming experience for users. It integrates with premium services like Real-Debrid and Trakt to provide high-quality streaming links for movies and TV shows. Seren stands out for its advanced features, such as automatic episode tracking, smart playlists, and personalized recommendations. With Seren, users can expect a seamless and personalized streaming experience with a wide selection of content to choose from.
21. Venom
Venom is another top-tier addon known for its vast content library and user-friendly interface. With sections dedicated to movies, TV shows, and live TV, Venom ensures a diverse streaming experience. It supports Trakt integration for personalized content recommendations.
- Open Kodi and go to Settings.
- Click on File Manager > Add Source > None.
- Enter the URL “https://123venom.github.io/” and name it “Venom.”
- Return to the home screen, click on Add-ons, then the package icon.
- Choose Install from Zip File > Venom > repository.venom-x.x.x.zip.
- Install from Repository > Venom Repo > Video Add-ons > Venom > Install.
22. Rising Tides
Rising Tides is a sports-centric addon catering to enthusiasts who crave live sports action. With a wide range of sports channels and live streaming options, Rising Tides is the go-to addon for catching your favorite games in real-time.
Catering to sports enthusiasts, Rising Tides focuses on live sports. Install it by following these steps:
- Open Kodi and go to Settings.
- Click on File Manager > Add Source > None.
- Enter the URL “http://mullafabz.xyz/Repository/” and name it “Rising Tides.”
- Return to the home screen, click on Add-ons, then the package icon.
- Choose Install from Zip File > Rising Tides > repository.Rising.Tides-x.x.x.zip.
- Install from Repository > Rising Tides Repo > Video Add-ons > Rising Tides > Install.
23. Sportowa TV
Sportowa TV is a dedicated sports addon offering live streaming of various sports channels. Whether you’re into football, basketball, or niche sports, Sportowa TV ensures you never miss a game with its reliable live streaming.
Focused on live sports channels, Sportowa TV is easy to install:
- Open Kodi and go to Settings.
- Click on File Manager > Add Source > None.
- Enter the URL “https://mbebe.github.io/blomqvist/” and name it “Sportowa.”
- Go back to the home screen, click on Add-ons, then the package icon.
- Choose Install from Zip File > Sportowa > repository.sport-x.x.x.zip.
- Install from Repository > Sportowa Repo > Video Add-ons > Sportowa TV > Install.
Best Paid IPTV Addons for Kodi 2024
To have the optimum experience of live TV streaming, you can always consider the option to go for paid Kodi IPTV addons. The money is well spent as it unlocks an extra line-up of channels and you will find guaranteed updated and running content all the time. Below you can find our list of the best paid live IPTV Kodi addons:
1. Nitro TV
Also ranking high in the best IPTV Kodi list is Nitro TV which offers hundreds of channels from Canada, the US, and the UK. It provides the comfort of watching your favorite UFC fights and UEFA Champions League games right at your home.
2. Gears TV
Gears TV works only on Kodi Jarvis and gives access to hundreds of live television channels globally. The content is full HD quality on all USA, UK, and Canadian channels and includes the top-of-the-line channels.
3. LiteIPTV
This too is featured on the best IPTV Kodi List. LiteIPTV offers a great deal of flexibility and consistency to customers at a reasonable price. It presents its users access to roughly 500+ channels and 200 HD channels from across the globe too with premium support.
Kodi IPTV download: Krypton Version 20.1
Here’s a guide to Kodi IPTV addons setup:
- Open the Kodi app and click on the Gear icon.
- Select “File Manager” from the list.
- Click the “Add Source” option.
- Enter the repository address and click OK.
- Add a name and click “Done”.
- Return to the home screen and click “Add-ons”.
- Select “Install from zip file” and click on “.Repository (Click Here)”
- Click on Install from Repository > select Relevant Repo > Video Add-ons.
- Find the relevant IPTV and click on Install.
- Return to Home screen > Add-ons > Video Add-Ons > IPTV.
Kodi PVR IPTV Simple Client
IPTV Simple Client is a basic PVR Addon for XBMC to receive IPTV Live TV, Radio channels, and EPG directly in XBMC. IPTV Simple PVR Client supports Kodi IPTV m3u list, streaming of Live TV for multicast/unicast sources, and even allows you to listen to Radio channels and EPG.
How to Setup PVR IPTV Simple Client Kodi 20.1
Here’s the guide to PVR IPTV simple client Kodi download
- Open Kodi
- Select TV
- Select Enter add-on browser
- Select PVR IPTV Simple Client
- Select Configure
- Select General
- If you have a URL for your m3u list set Location to Remote Path (Internet Address)
- Then Select the M3U Play List URL
- Enter the URL of your M3U PlayList and select OK
- If you have an M3U text file stored locally on your network/computer/box then set the Location to Local Path (include Local Network)
- Then Select the M3U Play List URL
- Navigate to where the file is stored and select it
- Select OK
- Select Enable
- Wait for the notification of channels loaded
Is Watching IPTV on Kodi Legal?
The legal landscape of IPTV on Kodi is complex and varies by region. While the technology itself is legitimate, the sources from which you access IPTV content can make a significant difference. Some providers offer legally licensed channels, while others might offer copyrighted content without proper authorization. It’s crucial to do your research and only use reputable IPTV services that adhere to copyright laws in your country.
Downloading and Installing an IPTV Kodi Addon
- Launch Kodi on your device.
- Navigate to the “Add-ons” section.
- Select “Install from repository” or “Install from zip file,” depending on the source of your addon.
- Browse the available addons and select the IPTV addon that suits your preferences.
- Click “Install” and wait for the installation to complete.
- Access the installed addon from the “Add-ons” section.
How to Watch IPTV on Kodi with Third-Party Addons?
Kodi is an open-source media player that supports various addons, which are extensions that enhance its capabilities. While Kodi itself doesn’t offer IPTV services, you can use third-party addons to integrate IPTV streams into the Kodi interface. Here’s a step-by-step guide on how to watch IPTV on Kodi using third-party addons:
Important Note: Before you proceed, ensure that you have the necessary permissions to access and stream the content available through IPTV services. Additionally, be cautious about using third-party addons, as they may not always provide reliable or legal content.
- Install Kodi: If you don’t already have Kodi installed on your device, you can download and install it from the official Kodi website (https://kodi.tv/download).
- Enable Unknown Sources: By default, Kodi restricts the installation of addons from unknown sources for security reasons. To install third-party addons, you need to enable this option:
- Open Kodi and go to “Settings” (gear icon) from the home screen.
- Select “System” or “System Settings,” depending on the Kodi version.
- Choose “Add-ons” and toggle on the “Unknown sources” option.
- Install an IPTV Addon: There are several IPTV addons available for Kodi. Two popular options are “Live TV Serbia” and “cCloud TV.” Here’s how to install an addon (using “Live TV Serbia” as an example):
- From the Kodi home screen, go to “Add-ons.”
- Click on the “Open box” icon (top left) to open the addon browser.
- Select “Install from repository.”
- Choose the “Live TV Serbia Repository.”
- Navigate to “Video add-ons” and find the “Live TV Serbia” addon.
- Click on the addon and select “Install.” Wait for the installation to complete.
- Configure the Addon: After the addon is installed, you need to configure it with your IPTV sources:
- Access the addon by going to “Add-ons” > “Video add-ons” > “Live TV Serbia” (or the addon you installed).
- Follow the prompts to add IPTV sources, which may involve providing URLs or playlist files.
- You may also need to enter authentication details if required by your IPTV provider.
- Access IPTV Channels: Once the addon is set up, you can start accessing IPTV channels and content:
- Open the addon and navigate through its menus to find the channels or categories you want to watch.
- Select a channel to start streaming. The addon will fetch the IPTV stream and begin playback.
- Navigating and Using the Addon: Different IPTV addons have varying interfaces and features. You can usually use the arrow keys, Enter, and Backspace keys on your keyboard or the navigation buttons on your remote control to navigate through menus and select channels.
Remember that the availability and quality of IPTV streams can vary, and some channels may not always be reliable or stable. Additionally, ensure that you are complying with copyright and streaming laws in your region when using IPTV services.
Why do I need a Kodi VPN for IPTV Installation?
Using a VPN (Virtual Private Network) while streaming IPTV content on Kodi is crucial for several reasons:
Privacy and Anonymity
A VPN masks your IP address, making your online activities anonymous. This prevents your ISP and other entities from monitoring your streaming habits.
Geo-Restrictions
Many IPTV streams are subject to geographic restrictions. A VPN allows you to bypass these restrictions and access content from different regions.
Security
VPNs encrypt your internet connection, protecting your data from potential hackers or cyber threats.
Avoid Throttling
Some ISPs might throttle your internet speed when they detect high data usage. A VPN can help you circumvent this throttling and maintain consistent streaming quality.
Content Access
A VPN lets you access IPTV services that might be blocked in your region, expanding your entertainment options.
To ensure a secure and unrestricted streaming experience, a Kodi VPN like Ivacy VPN is indispensable. By safeguarding your privacy, security, and access to content, Ivacy VPN helps you make the most of your IPTV installation on Kodi while adhering to legal and ethical guidelines.
Are Free VPNs safe?
Free VPNs are usually not safe to rely on. This is because free VPNs often leak user data to third parties without acquiring user consent. In contrast, Ivacy’s free VPN is backed by a strict No Logs policy and also abides by strong military-grade encryption. These features ensure absolute privacy and protection of user data.
Are VPNs legal?
VPNs are legal in most parts of the world. That being said, there are still regions where VPNs are considered illegal. To avoid any trouble, one should get in touch with a legal professional and ask about the legality of using VPNs in the region. If the professional says it is okay, they may subscribe to Ivacy VPN.
Final Thoughts
Watching TV is never going to be the same. The best Kodi IPTV addons will give you an experience like never before. If you feel we have missed out on any other Kodi IPTV addons then do let us know in the comments section below. Also, always ensure your online security and anonymity with Ivacy’s dedicated VPN apps that are best suited for your needs.


